
THE ULTIMATE F PRACTICAL TO SUCCESS !
You have completed all chapters of the course and you understand things very well . Now to complete your certification and get Certified you must follow the few easy steps below, completing this practical let you demonstrate your learning and knowledge you have acquired in the course. This practical test is for us to access your ability to finally grant you a certificate for completing the course successfully .
This practical uses world’s largest free e-commerce discovery network which helps millions of sellers wordwide to sell online across the world for free, choosing HipKart lets you complete this practical without spending any money all you need to spend is your knowledge you collected in the course .
Note : After practical you can even use same store you will creat to start making money like many other who have complete this course are making good income with just few months of running their online store .
It’s very simple, you only need to go step by step and complete steps.
Step 1: Create Online Store
First step of your practical is creating an online store. Let’s create a store on hipKart as its free. Click here to create Store, You will see a form like below
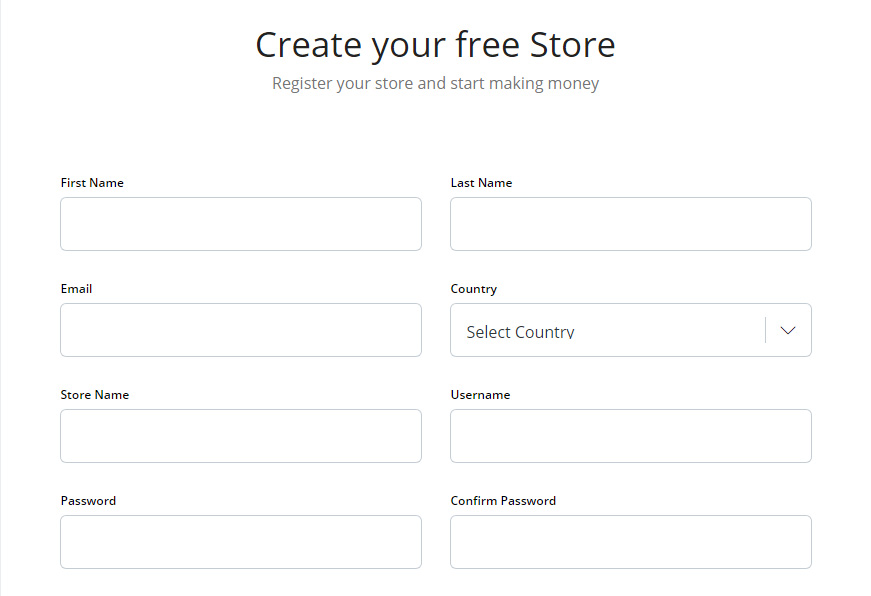
Fill your First Name, Last Name, a valid Email address, as all communication will be going on this email id. Choose your country. Enter Store Name, name of your store which you want to keep like (kumarFashions, KishorHandicrafts etc.) but don’t worry you can change this store name later as well . Enter Username you want to your hipKart account for login into future.
Once you create your store, you will be landed to Store settings page

You will your provided store name already there, here you must add your “Free vDomain”, this is your address on hipkart, its better if you use your storename for vDomain like kishorhandicrafts so it will become kishorhandicrafts.buyy.ltd, also complete this form add provide your Address, City, Phone Number, Zip Code etc. This is always good to have your information updated. You don’t need to worry about address, you can use your Home Address here and in phone number you can add your Mobile Number.
Wow!! You completed First Step and you have a Free Online Store.
Step 2: Get Domain for Store
In Step 1 you created an online store and although you get a free vDomain from hipKart but as it was explain into course you must have a domain for your store. To get a domain open GoDaddy.com

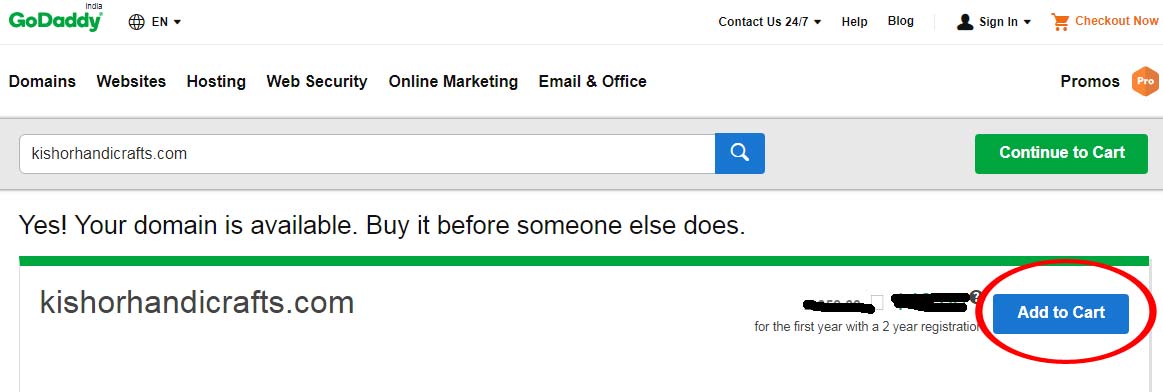
Enter a desired domain name here and then Add To Cart. Don’t worry if you don’t find exact match as you want like if you want kishorhandicrafts.com and Godaddy says this domain is not available don’t panic in this situation you can try different combinations of these as follow
kishorehandicrafts.com – Notice the “e” before “h”
kishorhandicraft.com – Removed the “s” in the last
kishorehandicraft.com – Added “e” before “h” and remove “s” in the last
thekishorhandicrafts.com – Add “the” before the name
Same way you can create any changes to your desired name and find which domain is available. Adding/Removing characters for domain name is never an issue it is the best practice to get desired domain name. As you see your desired domain name is available Click on “Add to Cart” button
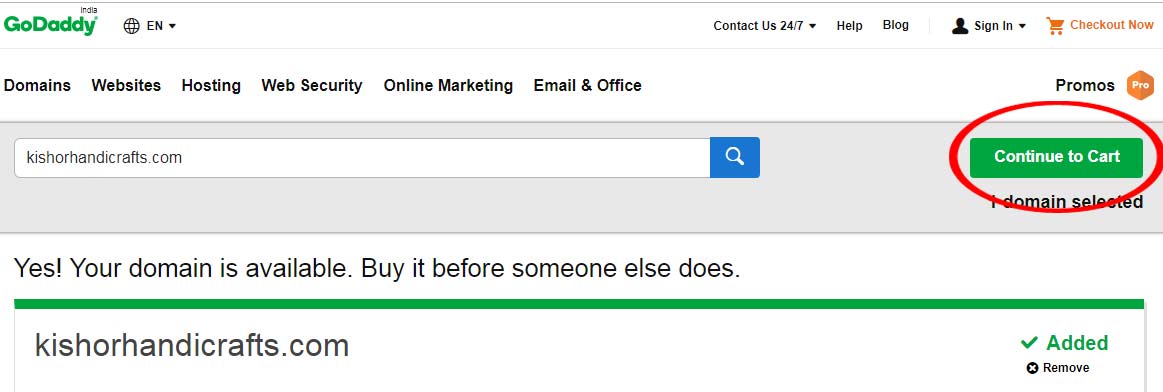
As you Add to Cart your domain then click on “Continue Cart”
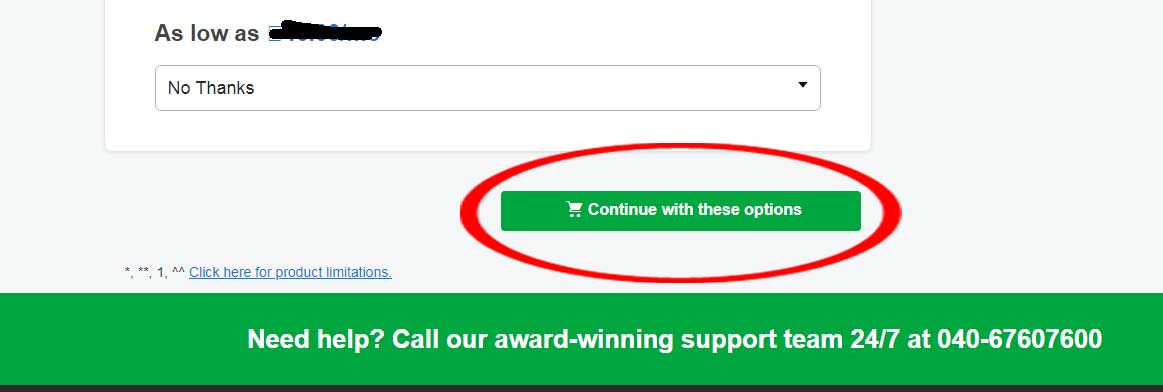
As you Click on Continue Cart you will see a page from GoDaddy asking you for more services like Hosting, Privacy, Email address etc. Choose “No Thanks” for all services and click on the button “Continue with these options”
As you click on “Continue with these Options” you will landed to Cart page of GoDaddy. Confirm on that page that you have added correct domain into your cart and then complete the purchase process by making Payment for your domain.
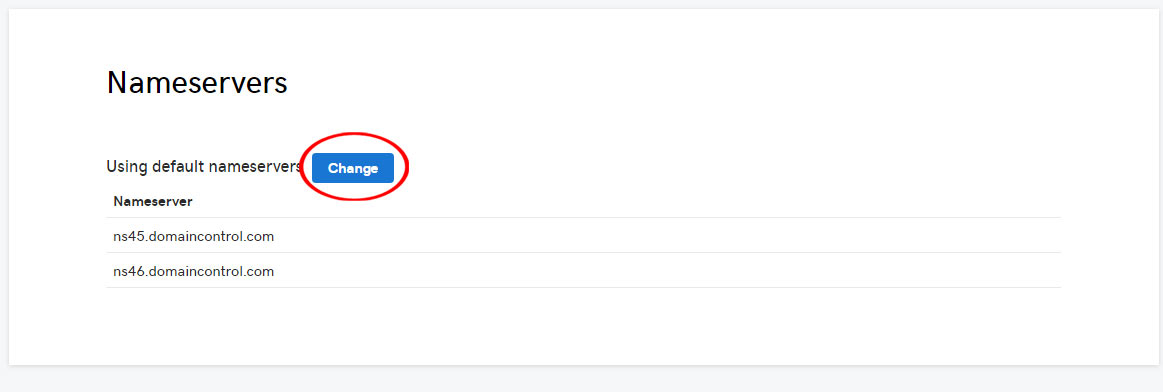
Once you make payment and buy the domain successfully, you can see that under “My Products” in GoDaddy. You will see your purchased domain under “Domains” tab and you can see buttons in front of your domain name. You need to click “DNS” button

As you click on “DNS” button you will landed on “DNS Management” page. Scroll the page down and look for “Nameservers” section on the page. You will see a “Change” button into that section.
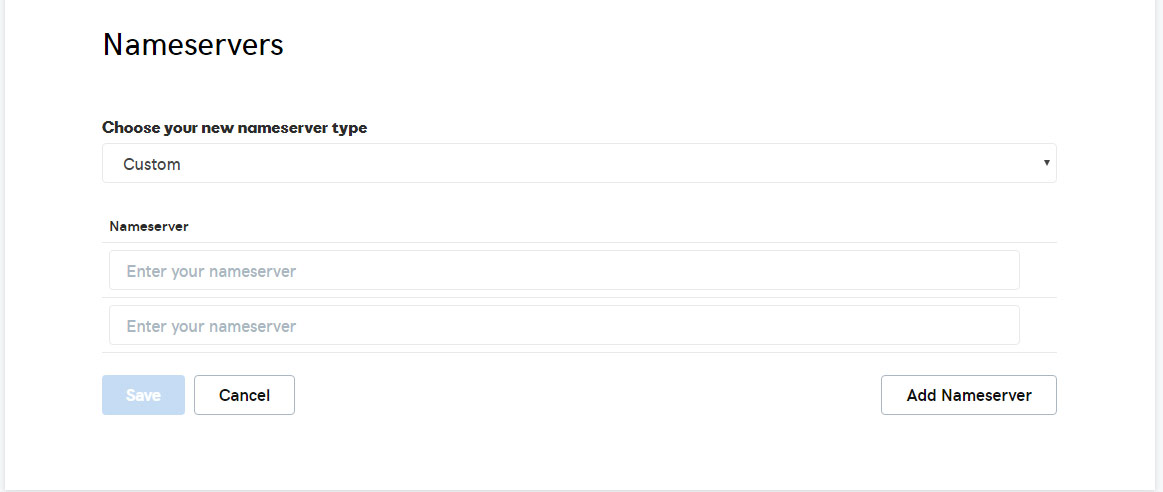
As you click on “Change”, this will ask you for “Choose your new nameserver type” choose “Custom” from the drop down and as you choose “Custom”, it will ask you for “Nameserver” with 2 input boxes.
You need to enter DNS values of hipkart into these input boxes, enter NS2.HIPKLOUD.COM and NS3.HIPKLOUD.COM into input boxes and then click on “Save” button
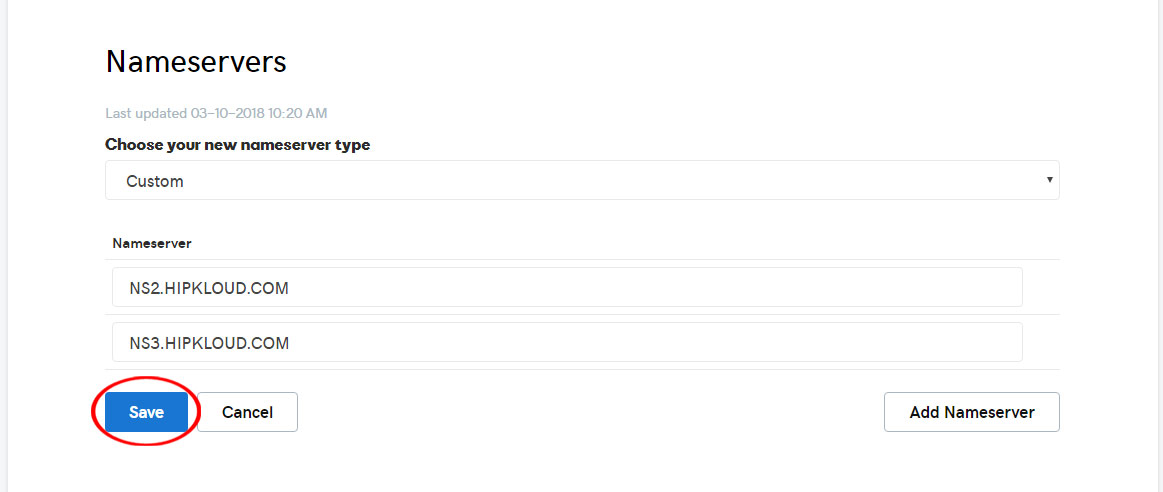
Your work is done here, now GoDaddy will point DNS for your domain to HipKloud server this process can take 24 – 48 hours. By that time let’s do the next steps.
Step 3: Attach domain with your store
Now you have a online store and you have purchased a desired domain. Now you need to link your store your domain, so that by the time GoDaddy will point DNS, HipKart also know about your domain and it will link that with your store.
Go to My Store > Domain Name > Store Domain in your hipKart store admin panel. Don’t forget that you have saved your store settings.
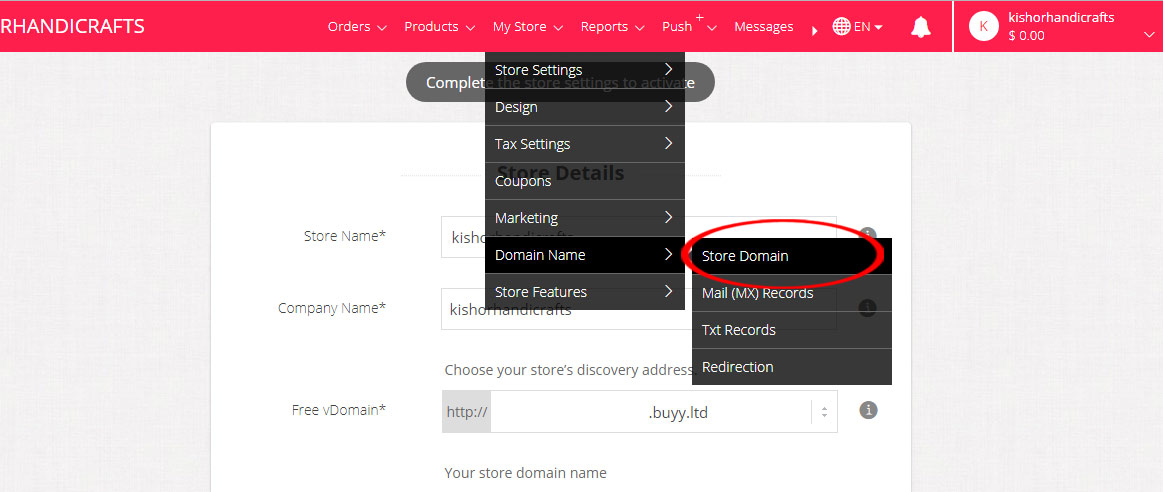
As you click on “Domain Name”, this will land you on page “Attach Domain with Your Store”
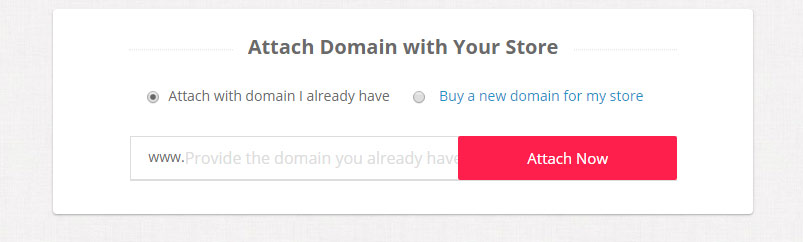
Enter your domain name which you have purchased from GoDaddy into input box and click on button “Attach Now”
By doing this your domain will be attached with your store now, as it will be activated as GoDaddy point DNS to HipKloud servers.
Don’t worry about waiting, as its the standard process. Let’s complete next steps.
Step 4: Add Products to store
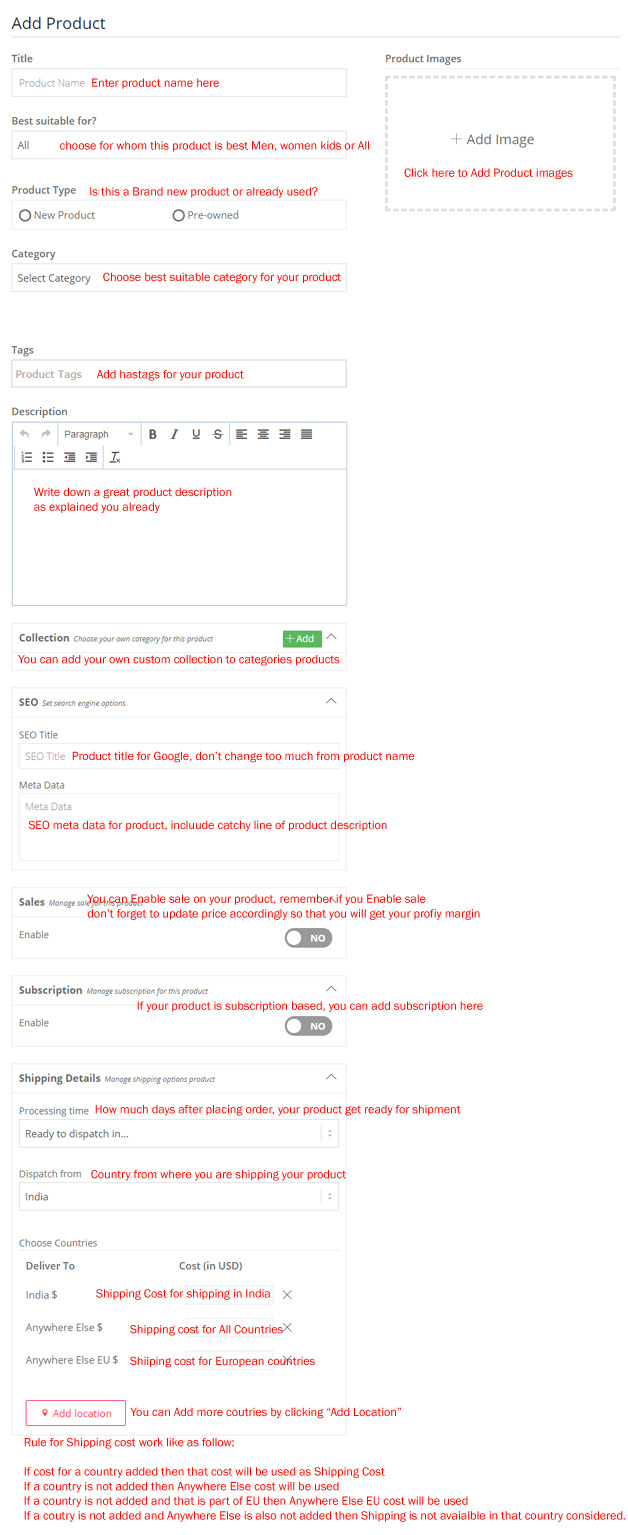
Great!! You have a online store and added a domain with your store. Now its time to add products into your store. As you already know what are the key requirements to add a product. You can start adding product from here. You will a form like below, We have added instruction into Red color so you can easily understand what you need to fill into the form.
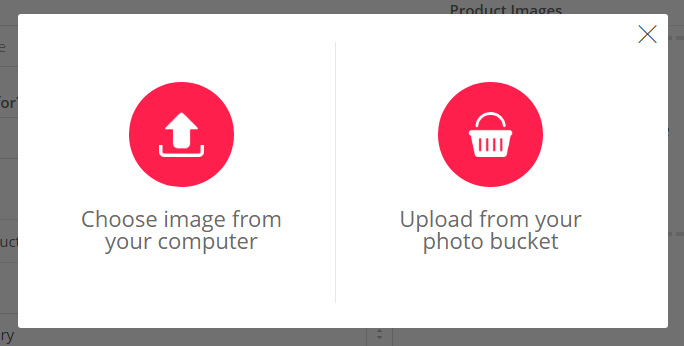
When you click on Add Image, this will ask you for source of image, you can click on “Choose image from your computer”
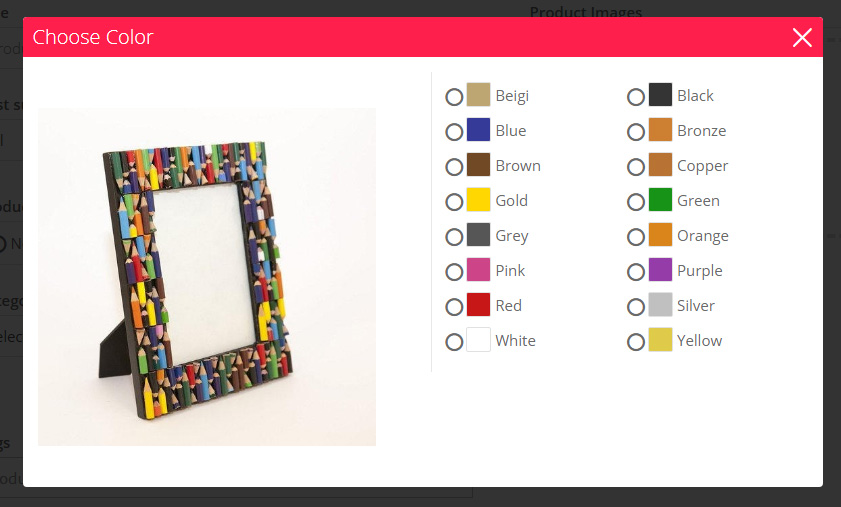
As you choose image for your product, it was ask you for color selection. Choose color of the product for which this image is related, If your product has only single color option then you can choose any default color and choose same for all images you upload for the product.
After you choose color, you can add option and pricing for your product.
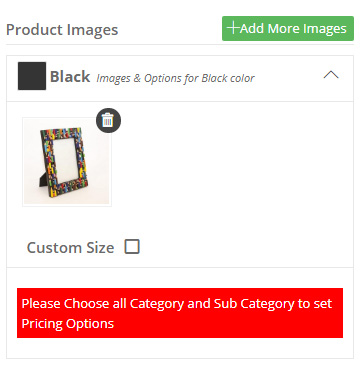
If you this, it means you have not selected Category and Selling Unit of your product. Choose proper categories for product so it will get listed under right category. And selling unit tells customer how this product is being sold by per piece, by length in meter/cm, by weight in kg/oz etc.

As you choose your category and proper selling units, you can add Options and Pricing information for your product.
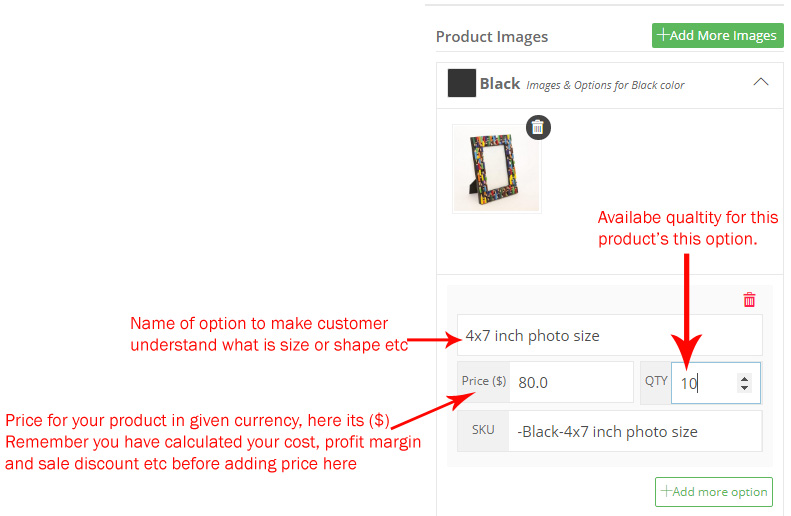
Here you add Option Name, user can understand what option he want to buy. Price for your product always consider costing, profit and discount in mind while adding price of product. Also provide available quantity of product as well.
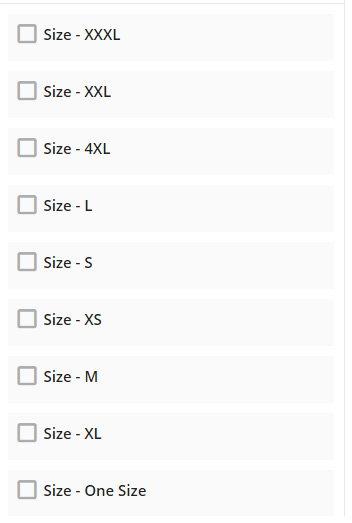
Sometimes you can see Options like this to Add price and quantity. This is for some general categories like cloths, shoes etc. Here you can click on Check box of the option which is available for your product.
Click on “Save Product” and your product will be added to store. Add all products you have into your store.
Step 5: Add Payment Gateway to your store
After adding all your products, its time to add a Payment Gateway to your store, so customer can make payments to your directly. You set up a payment gateway open this
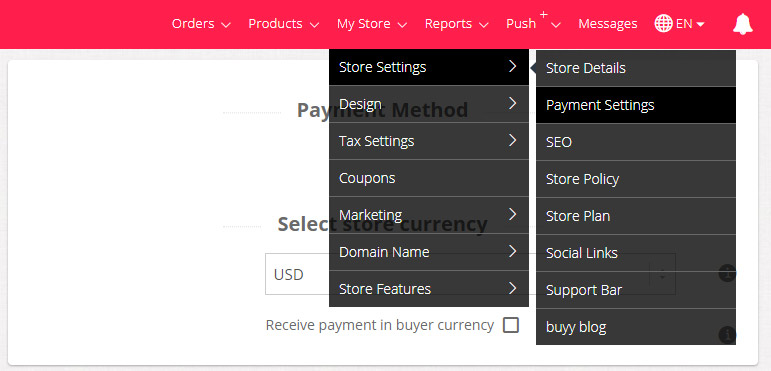
As you click on this, this will open you Payment Settings page, where you can set currency for your store and can choose payment gateway for your store.
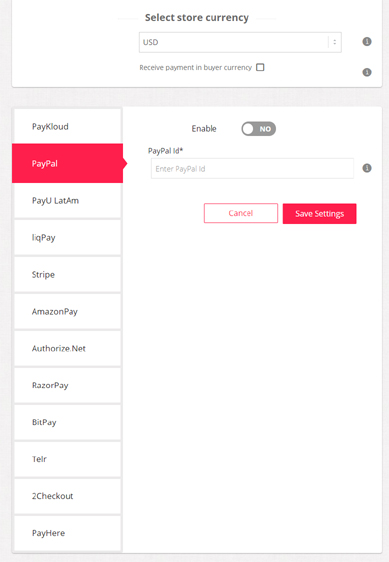
You can see list of Payment Gateways you can set up for your store on the left, Click on the Payment Gateway you want to add for your store, provide required details and Enable that gateway. After that as you click on “Save Settings”, the payment gateway will be added to your store. You can add multiple payment gateways to your store as well.
If you don’t have account with any Payment gateway and want to make this process fast, so that you can earn money faster. Choose PayKloud, this will get you ready for taking payments very fast just by few clicks. Click on PayKloud on left.

As you click on “Connect to PayKloud”, this will open a Signup form of Paykloud for you, provide your basic information and fill that form, it will create an account on Paykloud and also link your Paykloud with your store as well.
As your Paykloud account get connected to your store you will see the above page something like this
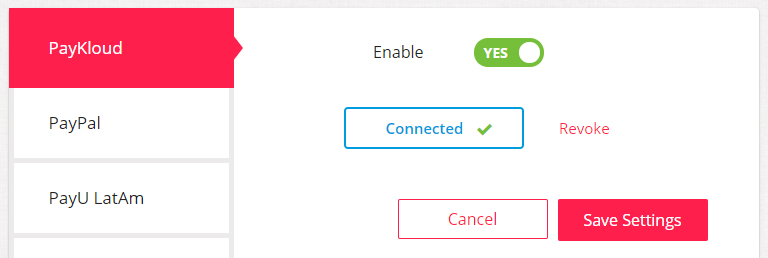
Click on “Save Settings” button and your Paykloud Payment Gateway will set up for your store.
Step 6: Set up theme for your storefront
Finally, after doing all set ups now you need to set up a great theme for your store. So that customers can be attracted through your website. Click here to see themes for your store.
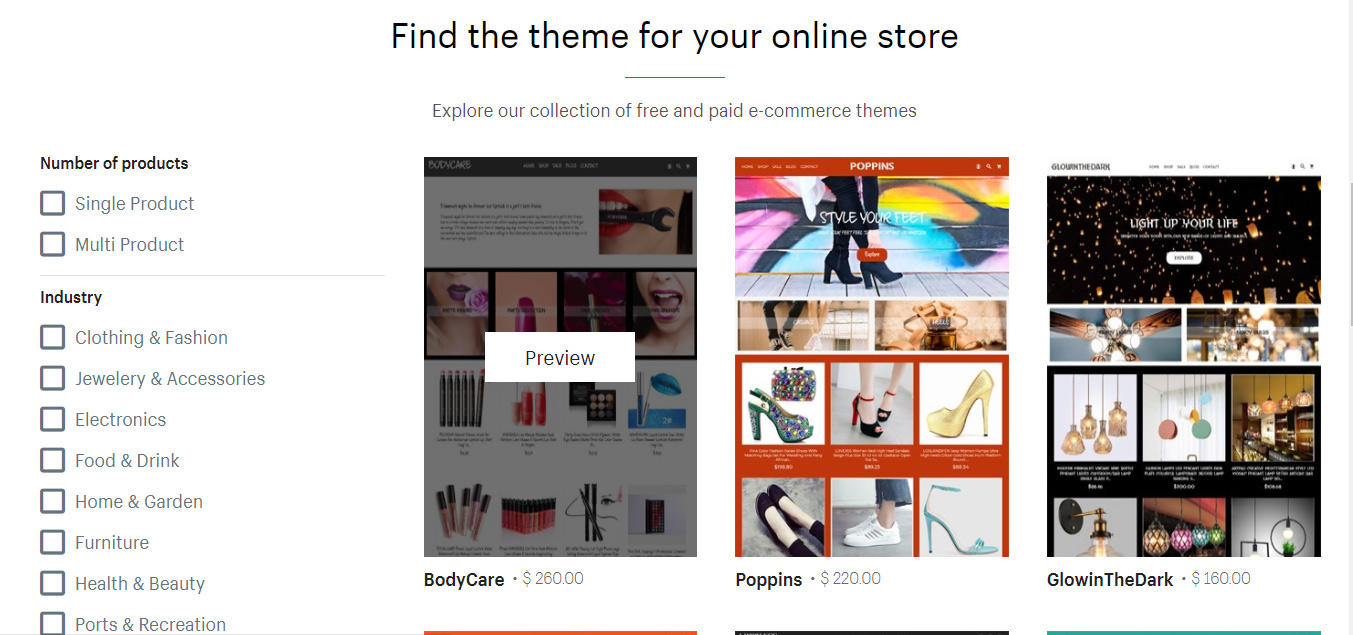
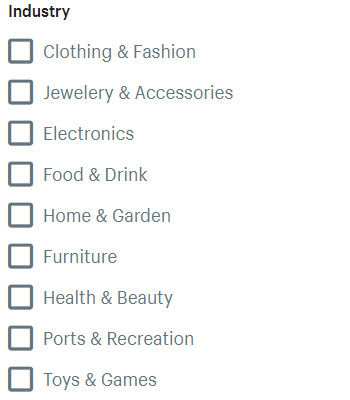
You can filter your selection from the filter given into the left side. You can find templates based on categories, so you can have better ideas for your store design which you like you can choose.
You can click on “Preview” to see the theme, how it looks like, you can also customize these theme by changing pictures, text, adding products of your own store. Once you customize the theme, you can apply this for your store by clicking on “Publish”
Submit your work

WOW ! Do you realize and really believe just completing this you not have earned yourself a certification in advance e-commerce but you have got your own free e-commerce store and also have earned yourself an opportunity to start earning big by starting your e-commerce career .
Bonus : Do you know a store like this if you hire a developer or use paid services it would cost you $400-800 and atleast $29-$150 per month. You need to realize that you already have something of $1000+ value.
Facts : Some Interesting Facts Of This course
75% Students who complete this course start their online business and reach a level of success in just few months .
Average Monthly Earning : $8000-$25000
15% Students use this course to become e-Commerce Builders and use this knowledge to create smart free stores and sell them for good price to their customers and people looking to get online store .
Average Monthly Earning : $3000-$10000
10% Students join large e-commerce company as an e-commerce expert and earn are happy with their new job career .
Average Monthly Earning : $7000-$9000
JOIN TO CONSULT – DISCUSS – SHARE YOUR VIEWS AND LEARN MORE @ FB GROUP